10-4 Damon on my part. Sorry for the stupid stuff (mine).
Now if I can ask a few post related questions to you and I guess to Sinista and whoever else have modded a Jon boat as well:
How is the stability when standing on these things? Do you guys use any particular type of foam underneath for buoyancy? Would you have to, due to any extra weight from any wood or any other additions?
I've often thought about the mod option to make more of a bass type boat out of a john boat, rather than use it as a cartopper. Although we've seen them used as both (Not gonna go there though, I promise)
I really look forward to watching this project progress and take shape more and more over the coming days, weeks, whatever it takes! Awesome job so far!
Nice job ! Nice shop too, I would kill to have all those clamps I see.
cool spray paint trick too.
Kmans got a thing for clamps, safety glasses and a good sharp chisel too!
Last edited by pocketfisherman on Fri Jan 20, 2012 11:51 pm; edited 1 time in total
Coming from a guy (ME)who built proto-type power and sail boats for close to 9 years in Rhode Island I gotta say you got your sh*t together, I like the earlier post about using the HVLP..lol, thats the only way to go, my personal favorite being Gravity Fed, Im going to have to get together with you after this season Damon, you have already seen my set up and I know it could use a big weight reduction, at the time I built it I needed to get it done and on the water as quick as possilbe, great job. look forward to seeing the finished product

Thanks again guys, should have all day tomorrow to work on it, we will see if I can pull it off!!
Roger, although I cant answer for Sinista or Chevin, I have found the modded jon boat to have quite a bit of stability. I've done multiple conversion designs/builds on a 10', 12', and now basically 2 14' including my own. My early designs were very similiar to Sinista's and Chevin's, a raised deck above the gunnale done using conventional framing materials, and 2 x 4'.
On the smaller rigs, those really under 12', the extra weight and higher center of gravity, from the raised decks, produced quite alot of instability. The larger rigs, with their increased beam, and larger displacement can still handle this style of deck with minimal decrease in stability.
I learned however, that just lowering the deck in the smaller boats, to just on top of the seat or with a small riser (See Chevins I believe he did this) helps but still wasn't enough. The key is in weight reduction. By changing my framing to aluminium and fine tuning the install, I was able to shave ridiculous amounts of weight. This additional weightloss combined with keeping the deck center of gravity as low as possible helps considerably in the boats stability. It eventually became the way I build all my boats now.
JUST SO WE ARE CLEAR, THIS DOES NOT MEAN YOU CANT FLIP IT OVER!!! LOL (You know I got your back if you do....) I BELIEVE THE ALL CAPITALS EXPLAINS IT ALL!!!!
Now for the foam question, I'm hoping maybe some other guys with experience or knowledge on this will chime in. I personally, my opinion, could take it or leave it in a modded jon boat application. I personally try to just recycle any foam I've removed to somewhere else, I have used 2part floatation foams in the past and yes it did work, but I didn't feel as if it made the boat sit any "higher" or feel more stabil on the water.
As I understand it a boats displacement is what causes it to float, the foam is there to keep the thing from hopefully not sinking should it fill with water. I assume the only way to make it more stabil effectively would be to increase its beam, draft, and displacement. Perhaps Sinista could chime in on this one, Im sure hes had more experience with the application of foam than myself.
Basshunter, I truthfully am just trying to keep the whole rig as light as possible, if I had to take a guess Id say 120lbs empty, but dont quote me on it, depends how crazy with accessories (aerator, timers, nav lights, 12v power outlets, rod holders, led lighting, etc.) he choses to put on it!!! Ill let you all know the final weight at the end.
Last edited by fallentimber on Sun Jan 22, 2012 6:46 am; edited 1 time in total
It is through the hull for the initial fill up and to drain the livewell. This is instead of putting in pumps, which would add weight and cost. The water will fill/drain to whatever the water level is outside the boat. You will have to fill it manually after that.
Your correct about the foam things Damon, its primary purpose is to improve the chances of the vessle staying afloat should she fill with water or flip over.
The only advantage to using foam would be in an instance you were molding your own hull, we use to build The Reichel- Pugh 42 a one man design sail boat, Dennis Connor sailed one around the world.
The boat was 42 ft long built from layers of Carbon Fiber and Kevlar mat laid on 45 degree angles to each other, the core of the boat was 5/8 in high density foam, i believe the overall hull thichness was under an inch, she had twin internal ballasts containing water to allow one man to control her (water would pump from side to side while turning to avoiding having 20 screaming sailors hanging over the side, lol), completely assembled keel rigging mast sails etc, she was alittle over 11,000lbs which is about half the weigh of a conventional sailboat of the same size
My jon boat is very stable, although she weighs a million pounds which is probably why
So I figured I go back to the boat project, clearly you gotta give the people what they want! Sunday clearly was a wash, Monday was filled with work, did manage to squeeze in a few hours today between glue ups however!! This is what got done so far:
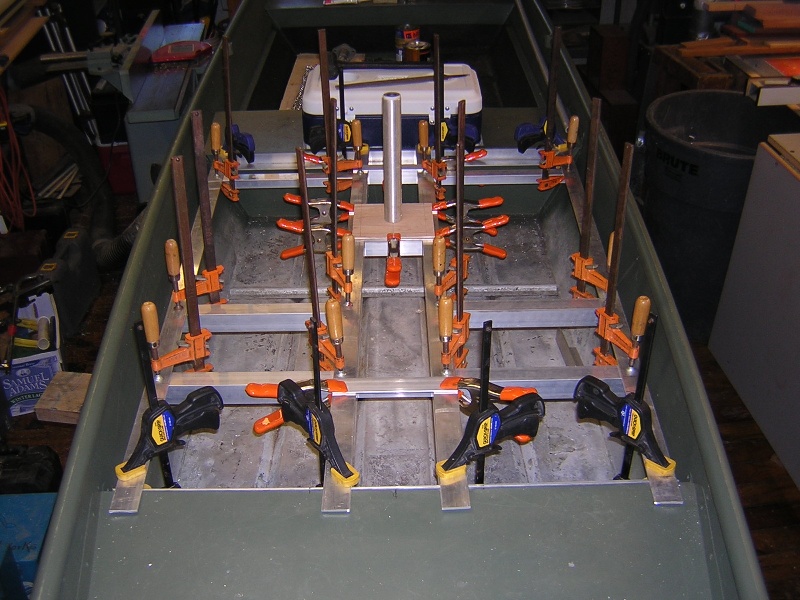
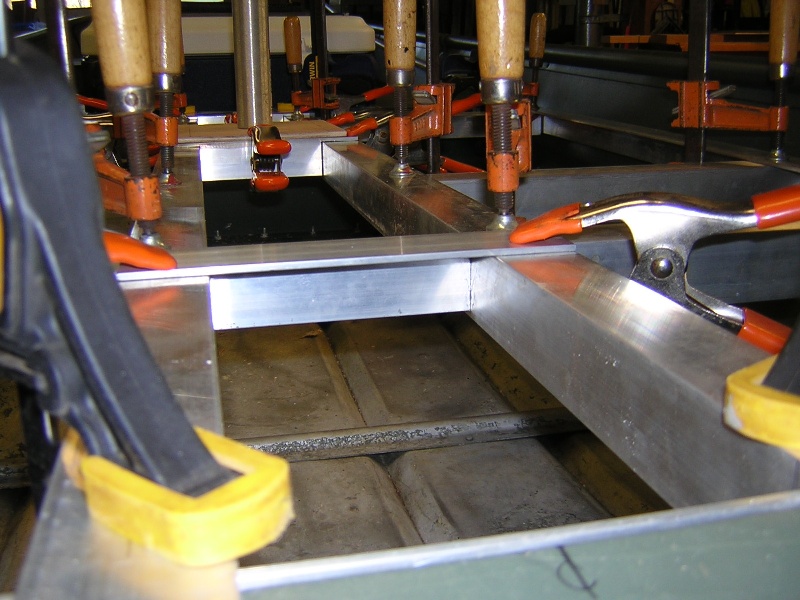
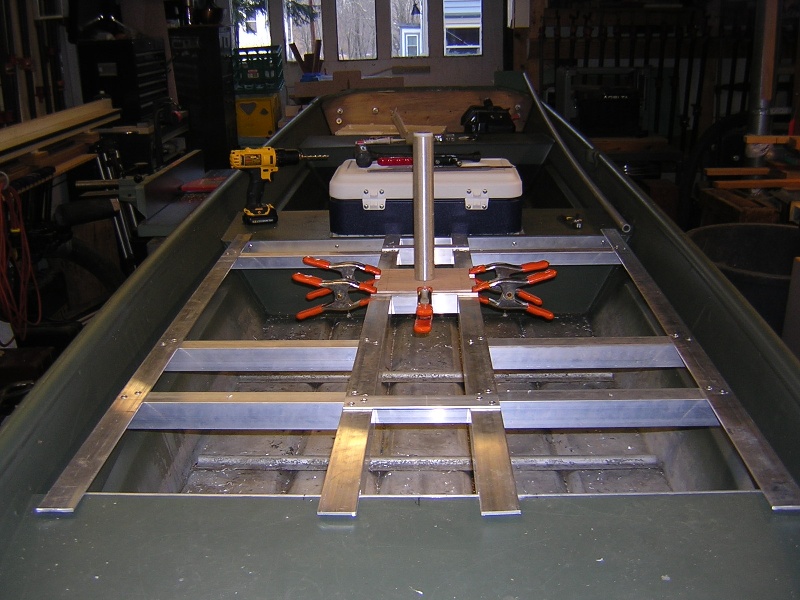
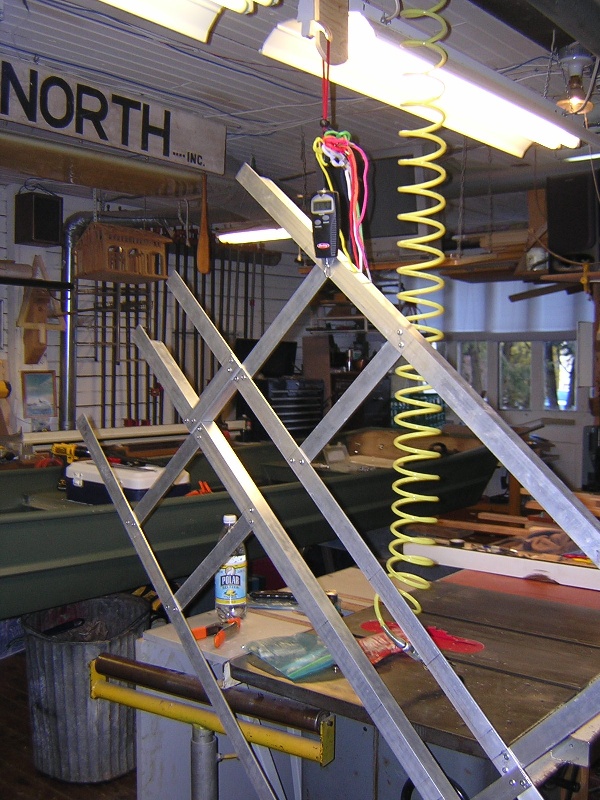
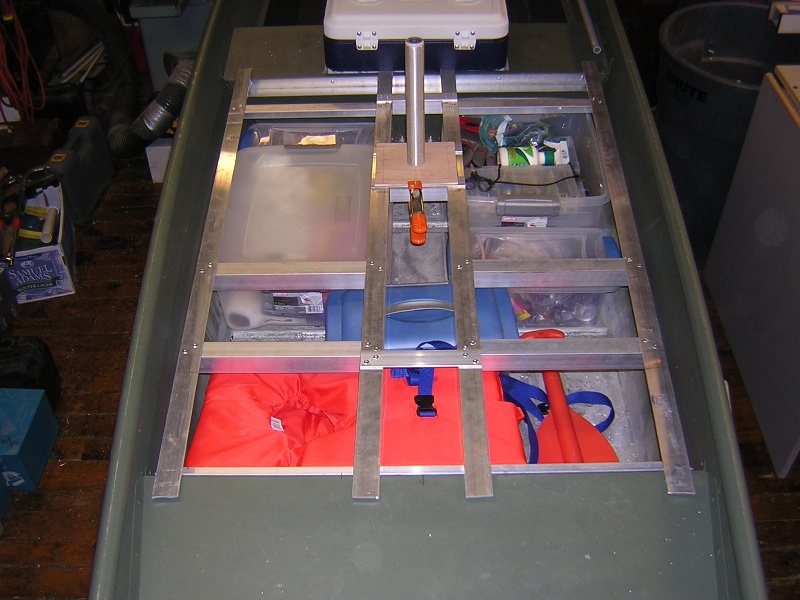
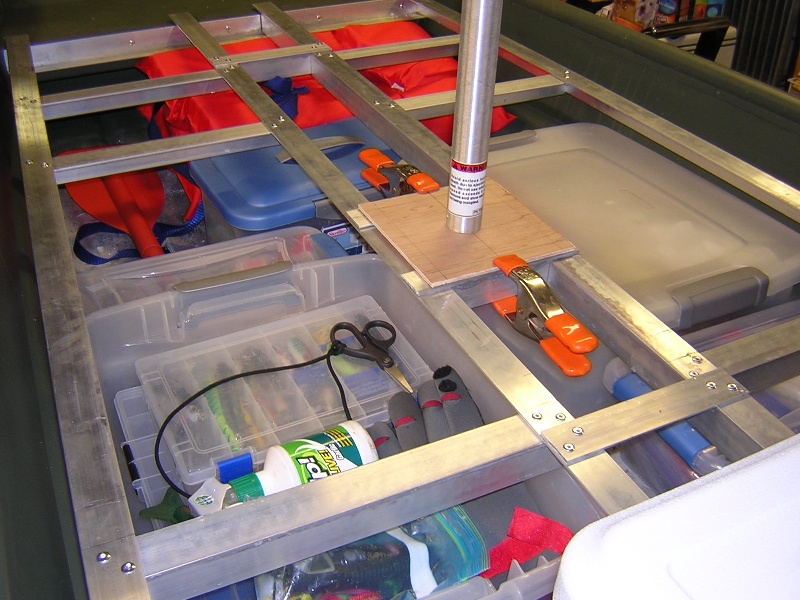
Finished the aluminium deck frame, the photos will show what it looks like. Threw a couple in there for Kman with all the clamps in use, normally I fasten as I go but couldnt resist showing you 32 clamps in action at once!!! You thought you had a clamp fetish!!! lol
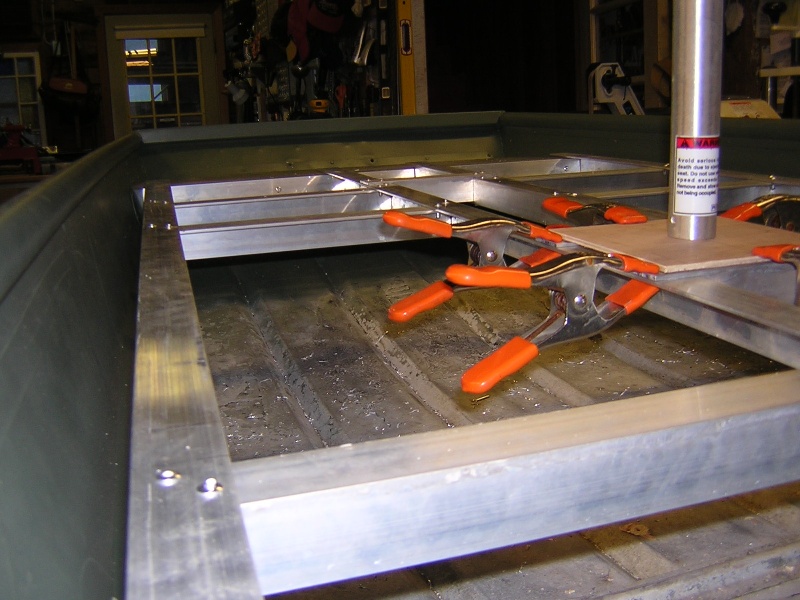
It is important to note the orientation of the aluminium angle in the photos, this is critical for the system to work correctly. The L orientation must be installed correctly in order to square the assembly, and properly support the deck. Remember all this is being spanned with our deck plywood and fastened through key areas, the whole assembly is then fastened to the boat making it all removable. If the pictures dont explain just ask and I can go into further detail. I should note that now is the time (during frame construction) to start thinking about what your gonna put under there, I used my own equipment in this case (cause I know It works), to figure hatch positioning and sizing. The location of the central supports under the seat is also critical , note in the photos, they are spaced to allow for attachment of the seat post base, and to allow for the two opposing hatches to land and be hinged on. I used the plywood as a visual template to give me the hole centers for the post base, firgured it would be easier for you all to see what I mean. Like I said If you have any questions ask!!
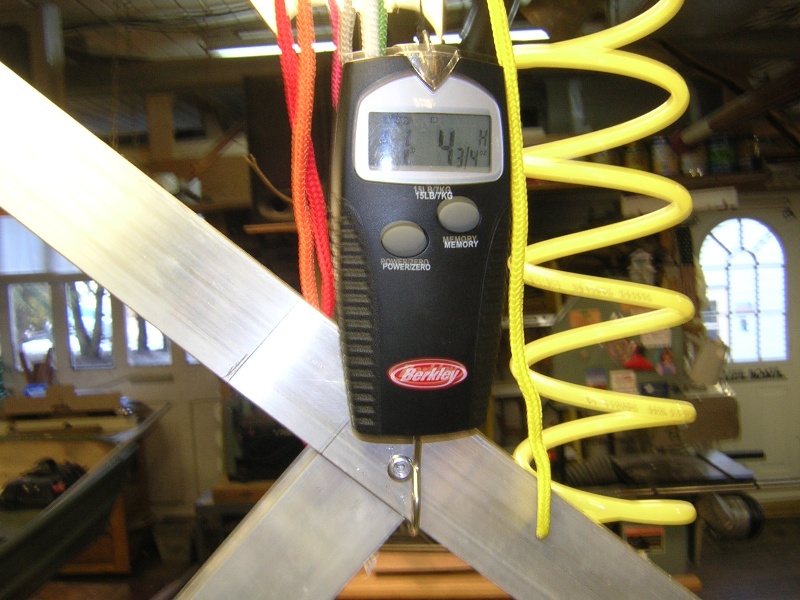
Oh and for those of you interested, the completed deck frame assembly (less post base) weighs in at 11lb 4oz, yes it is hanging from my tourney scale.... hope its not off!!! lol

Finished the aluminium deck frame, the photos will show what it looks like. Threw a couple in there for Kman with all the clamps in use, normally I fasten as I go but couldnt resist showing you 32 clamps in action at once!!! You thought you had a clamp fetish!!! lol
It is important to note the orientation of the aluminium angle in the photos, this is critical for the system to work correctly. The L orientation must be installed correctly in order to square the assembly, and properly support the deck. Remember all this is being spanned with our deck plywood and fastened through key areas, the whole assembly is then fastened to the boat making it all removable. If the pictures dont explain just ask and I can go into further detail. I should note that now is the time (during frame construction) to start thinking about what your gonna put under there, I used my own equipment in this case (cause I know It works), to figure hatch positioning and sizing. The location of the central supports under the seat is also critical , note in the photos, they are spaced to allow for attachment of the seat post base, and to allow for the two opposing hatches to land and be hinged on. I used the plywood as a visual template to give me the hole centers for the post base, firgured it would be easier for you all to see what I mean. Like I said If you have any questions ask!!
Oh and for those of you interested, the completed deck frame assembly (less post base) weighs in at 11lb 4oz, yes it is hanging from my tourney scale.... hope its not off!!! lol