So with full winter upon us (mild as it may be!) I have returned to my shop in full retreat!! Although Im a licensed general contractor, primarily my focus has been architectural millworks, furniture, cabinet making, countertops and general fabrication/design.
Subsequently, I have at my disposal, and in my back yard, a good size shop that houses all my woodworking/millwork/fabrication equipment. Now in the past years been using my fabrication abilities to convert my own, and friends jon boats into the rigs many of you have seen Team Beaver Fever in at the cartoppers.
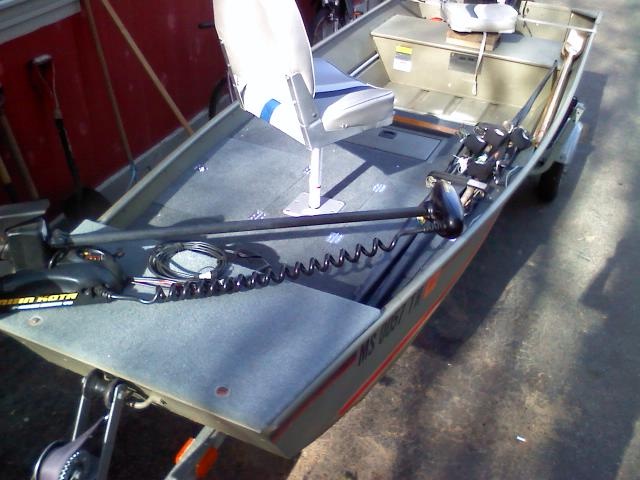
I have designed and built these to be stable and lightweight, and to retain as much "portability" as possible. The 14' Tracker I run currently weighs in at a paltry 165lbs unloaded with decks on!! So if there is any question if a decked jon qualifies as a topper I'll carry it on the roof of my van to the next topper just to squash the discussion altogether! (Sorry had to throw that in there, might as well kick the dead horse as well as beat it!)
Needless to say, I was approached by a friend with a 1960's, I want to say, 13'8" 34"wide Jon boat. He had picked it up for 175.00 with a run down trailer (total loss...read on) an old Evinrude 2hp (not running), 2 busted up swivel seats, and more pine needles than I can describe. It had sat in the woods on the edge of a pond for probably 5 years since its last voyage.... not pretty to say the least.
After a full cleaning and inspection it appeared to have decent bones and I agreed to give it a "deck" job. Gonna try and do this on a tight budget to see how cheap we can do it just for fun. Figured Id post up the progress as I go, trying to do it between my actual "paying" jobs so bear with me on time!! I'll also try and take as many photos as I can, hope you guys enjoy!!
Phase I:
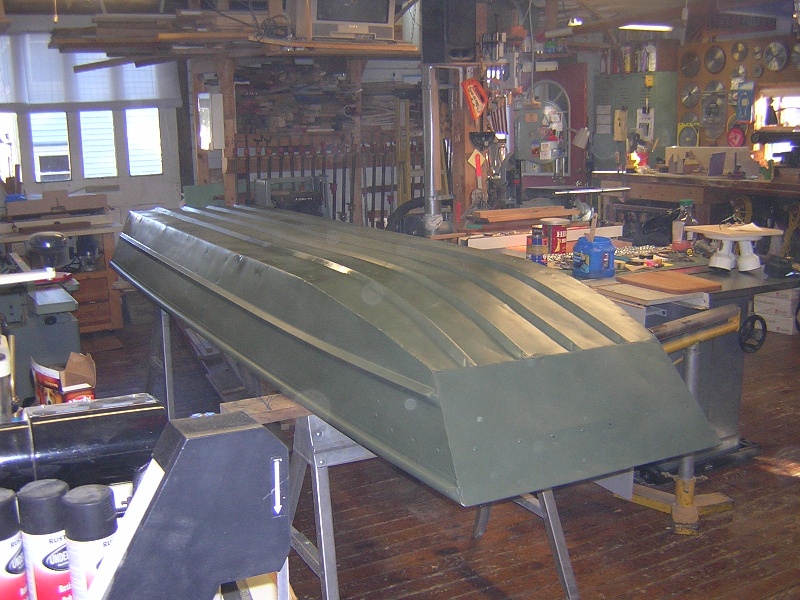
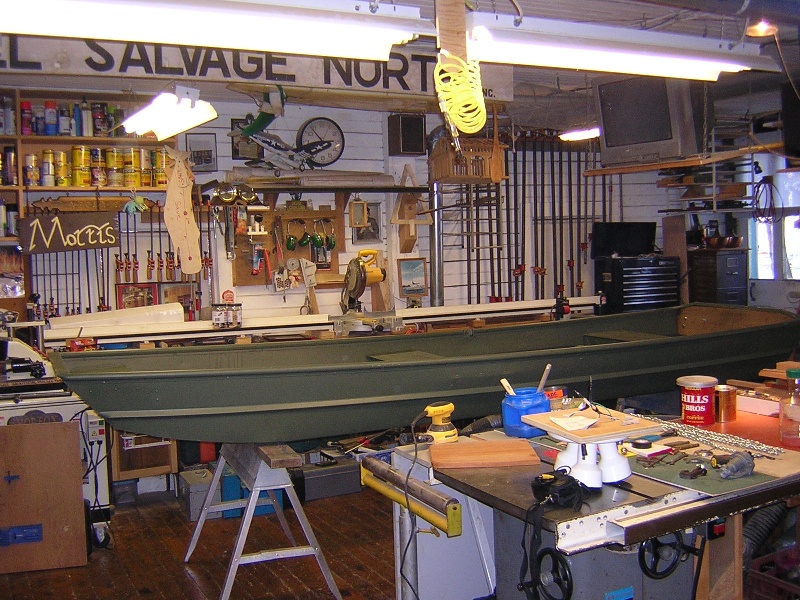
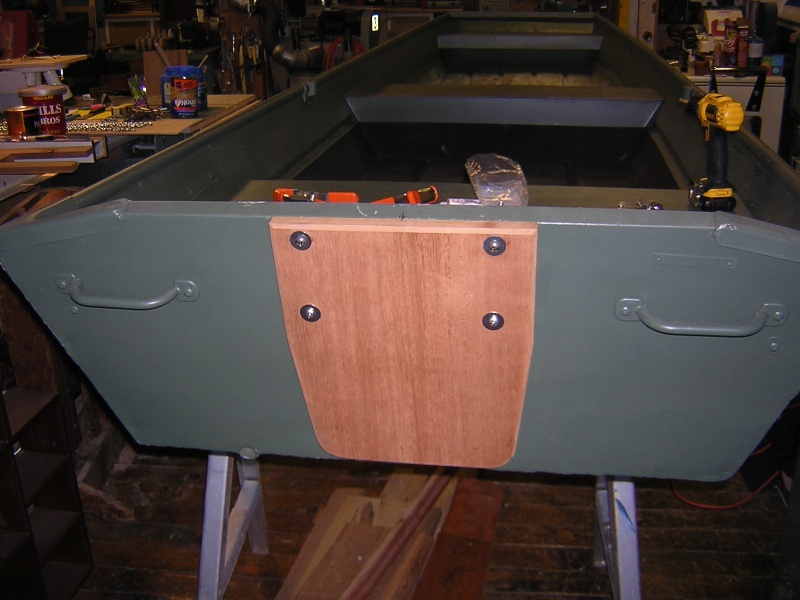
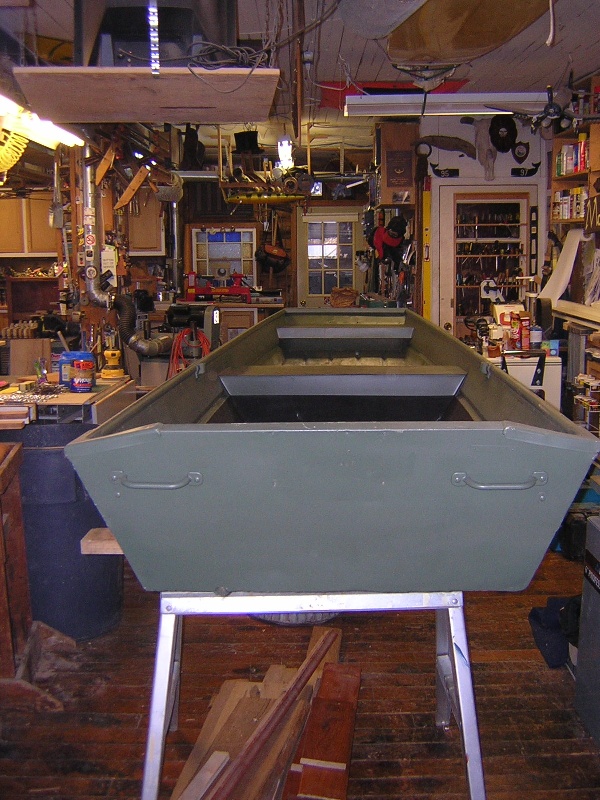
Full cleaning with TSP, followed by sandblasting of entire hull, repair of small crack on stern, repair of broken seat rivets, fabrication of new innner transom support, new outer transom plate, priming of interior/exterior of hull, painting of entire hull.
Now your all gonna have to bear with me, I had tons of "off the truck" photos, I received the hull in early fall so much of the prep (sandblasting, priming,painting) actually happened then. Unfortunately my camera that had them bit the dust so I'm fast forwarding to today. Hopefully I can find them and put them up.
This is where we are at to date in terms of cost (not inc. labor):
Donor Hull: 175.00 (Got 125.00 at the scrap yard for the trailer and non running motor!!!) 50.00!!!!
Sandblasting medium: 35.00 (Threw this in, even though I had it in stock it is technically a cost)
Aluminium Brazing rod: 5.00
Misc Hardware (Stainless): 30.00
12 cans Primer/12 cans Olive Drab Walmart special!!! 60.00 (Quick tip fo those who have actually read all this, before painting out of spray cans putem in a bucket hot water for 5-10 min. Warms up the paint and allows it to flow smoother out of the can.)
6/4 Poplar for Transom: 6.00
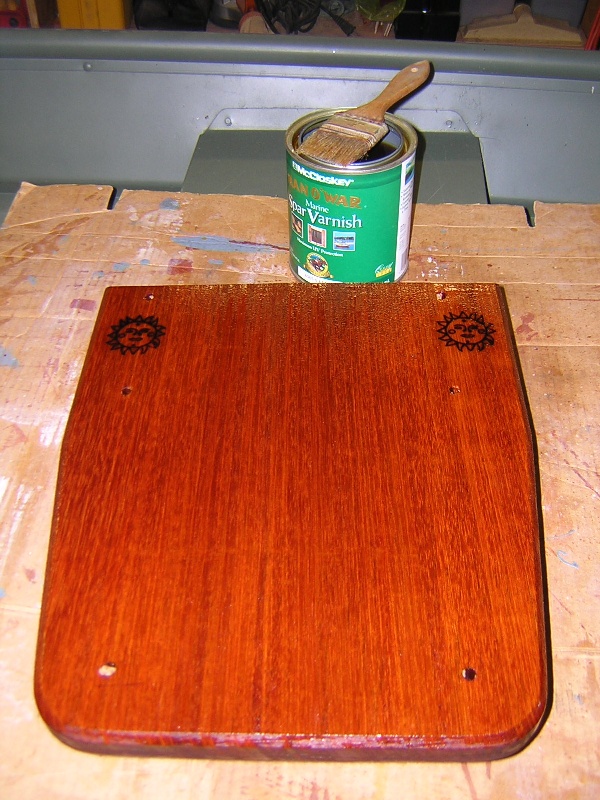
4/4 Honduran Mahogany for Transom: 9.00
Augusta Woodworks Sun Logo: Free
1 1/2" x 1 1/2" Aluminium Angle Iron 4 @ 16' (Deck framework): 60.00
Total so far: 255.00 Hull refurbished, Transom repaired, deck frame materials have been acquired!!
I should be putting some time in on the deck frame and some odds and ends tomorrow and this coming week, I'll post up progress and the running cost as I go for those interested. Figured I gotta do something to keep me busy waiting for the tourneys to start!! Feel free to ask me any questions, or chime in with suggestions always open to new ideas and perspectives!!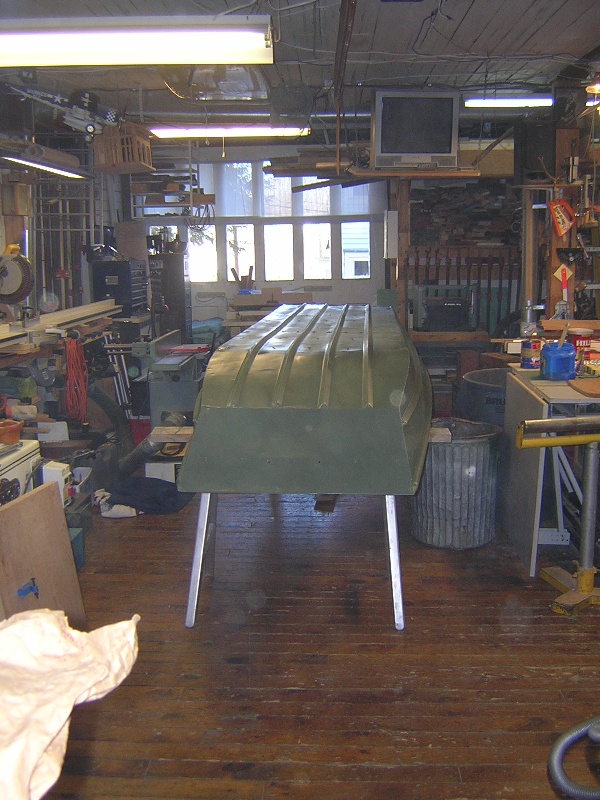
Subsequently, I have at my disposal, and in my back yard, a good size shop that houses all my woodworking/millwork/fabrication equipment. Now in the past years been using my fabrication abilities to convert my own, and friends jon boats into the rigs many of you have seen Team Beaver Fever in at the cartoppers.
I have designed and built these to be stable and lightweight, and to retain as much "portability" as possible. The 14' Tracker I run currently weighs in at a paltry 165lbs unloaded with decks on!! So if there is any question if a decked jon qualifies as a topper I'll carry it on the roof of my van to the next topper just to squash the discussion altogether! (Sorry had to throw that in there, might as well kick the dead horse as well as beat it!)
Needless to say, I was approached by a friend with a 1960's, I want to say, 13'8" 34"wide Jon boat. He had picked it up for 175.00 with a run down trailer (total loss...read on) an old Evinrude 2hp (not running), 2 busted up swivel seats, and more pine needles than I can describe. It had sat in the woods on the edge of a pond for probably 5 years since its last voyage.... not pretty to say the least.
After a full cleaning and inspection it appeared to have decent bones and I agreed to give it a "deck" job. Gonna try and do this on a tight budget to see how cheap we can do it just for fun. Figured Id post up the progress as I go, trying to do it between my actual "paying" jobs so bear with me on time!! I'll also try and take as many photos as I can, hope you guys enjoy!!
Phase I:
Full cleaning with TSP, followed by sandblasting of entire hull, repair of small crack on stern, repair of broken seat rivets, fabrication of new innner transom support, new outer transom plate, priming of interior/exterior of hull, painting of entire hull.
Now your all gonna have to bear with me, I had tons of "off the truck" photos, I received the hull in early fall so much of the prep (sandblasting, priming,painting) actually happened then. Unfortunately my camera that had them bit the dust so I'm fast forwarding to today. Hopefully I can find them and put them up.
This is where we are at to date in terms of cost (not inc. labor):
Donor Hull: 175.00 (Got 125.00 at the scrap yard for the trailer and non running motor!!!) 50.00!!!!
Sandblasting medium: 35.00 (Threw this in, even though I had it in stock it is technically a cost)
Aluminium Brazing rod: 5.00
Misc Hardware (Stainless): 30.00
12 cans Primer/12 cans Olive Drab Walmart special!!! 60.00 (Quick tip fo those who have actually read all this, before painting out of spray cans putem in a bucket hot water for 5-10 min. Warms up the paint and allows it to flow smoother out of the can.)
6/4 Poplar for Transom: 6.00
4/4 Honduran Mahogany for Transom: 9.00
Augusta Woodworks Sun Logo: Free
1 1/2" x 1 1/2" Aluminium Angle Iron 4 @ 16' (Deck framework): 60.00
Total so far: 255.00 Hull refurbished, Transom repaired, deck frame materials have been acquired!!
I should be putting some time in on the deck frame and some odds and ends tomorrow and this coming week, I'll post up progress and the running cost as I go for those interested. Figured I gotta do something to keep me busy waiting for the tourneys to start!! Feel free to ask me any questions, or chime in with suggestions always open to new ideas and perspectives!!
Having been in D-Man's shop I can tell you... he's TOO MODEST...I noticed there's no compressor in the shots...that'd be your ULTIMATE time saver in the paint process(it'll 'throw' your primers too) ...having spent 1,000's of hours in the paint booth at the weld shop(some 100 years ago now) ...we used cans for touch-ups and "details" ONLY...AND "you" end up with NO aeresol(of course "ya" LIKE t' huff paint then DISREGARD)hahahaha... AND you can get a pretty killer spray nozzel set up for 5,6,7 or 8" passes (HUGE TIME SAVER) ...and in the end save a little MORE money off the 'bottom-line" by getting ACCURATE AMOUNTS of paint for each rig(Custom Colors mixed by the gallon too)...which ALSO leaves for less waste and NO CANS in the landfill...and if you DO have a compressor the nozzel set-ups can be pretty affordable ---'pretty much a given why I'll be bringing whatever rig I buy to your shop...I don't care if its a 2"by4" I'm sure it'll somehow be lake-worthy 
Last edited by riverrat82 on Fri Jan 20, 2012 9:44 pm; edited 1 time in total
Last edited by riverrat82 on Fri Jan 20, 2012 9:44 pm; edited 1 time in total

YOUR A GOOD MAN TAKING ON THAT PROJECT FOR HIM IT WILL KEEP YA BUSY I KNOW HOW WINTERS CAN BE FOR THE CONTRACTOR BRO.WE WERE JACKHAMMERING POST HOLES FOR A SCREENED IN PORCH ADDITON HA HA BUT NICE TO HAVE SOMETHING TO DO TO KEEP SANITY KIDDDDDD SEE YA SOON!!!
Thanks guys for all the positive replies!! Hope you all continue to enjoy it.
Riverrat I do understand how much faster using a spray gun would be, leave yours at home I run all Sata HVLP guns for any real finishing, if youve sprayed before then I dont have to say anything else!! I do appreciate the suggestion thou.
As for my choice of cans, Im trying to do this as an everyday mans build, done with convention tools, hopefully some of this will inspire guys to do a couple weekend projects with there buddies or kids!! All Im using to do this is a drill, skilsaw, sawzall and basic hand tools, and patience. I dont want this to be beyond the reach of the guy that doesnt have a crazy shop!!
Skoda, as for the sandblaster, yup I do have one, a benefit of being a third generation tool nut!! The same effect can be had with a little elbow grease and some sandpaper and wire brushes. Does help having timesavers thou....
Phase II: Deck Frame, Cooler/Livewell
Woke up early, put another coat on the rear transom board, worked on a clients piece until round 11:30 or so then ran to Walmart to procure additional boat supplies!!
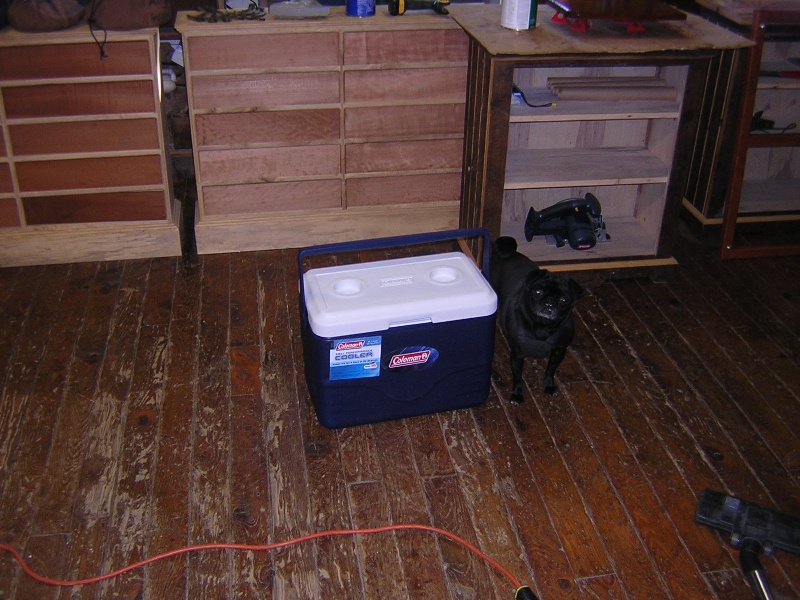
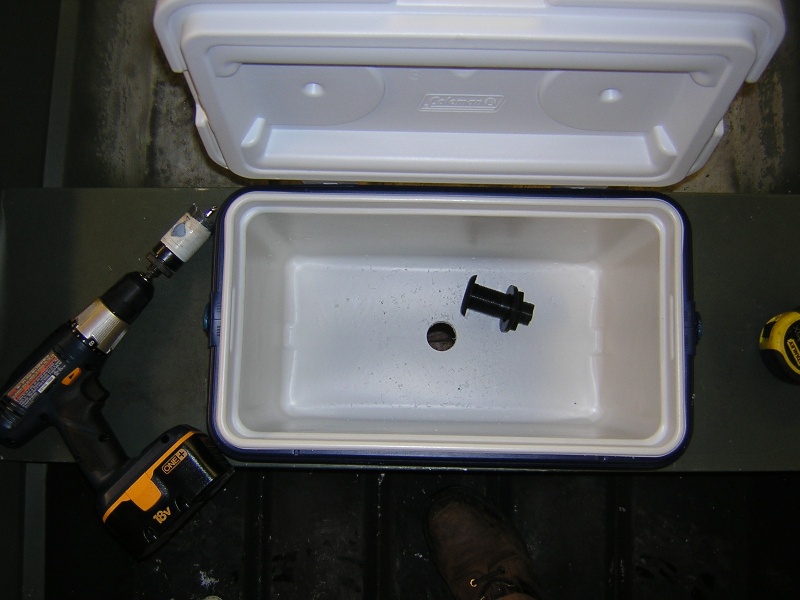
9Gal Coleman Cooler: 12.00 (Clearance aisle)
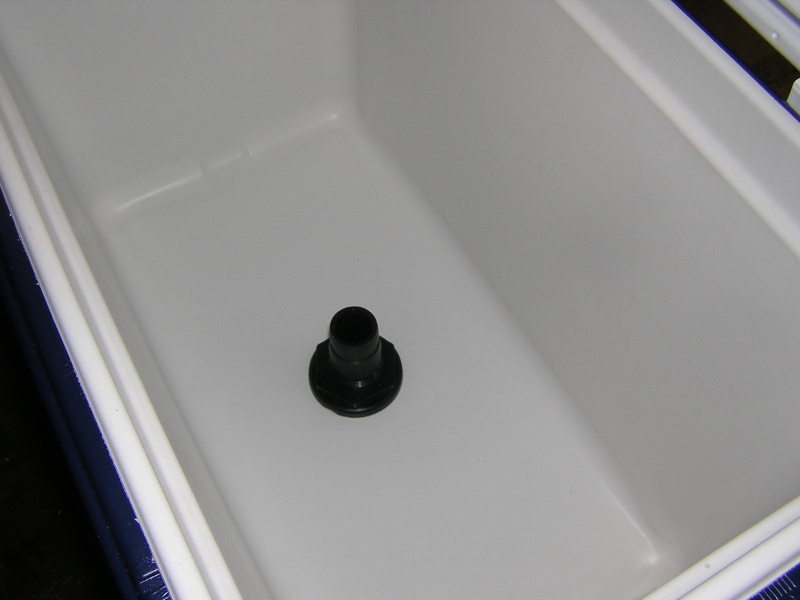
1 1/8" thruhull fiting: 4.00
3/16 x 1" Aluminium poprivets 6.00
255.00 + 22.00 = 277.00 Total so far
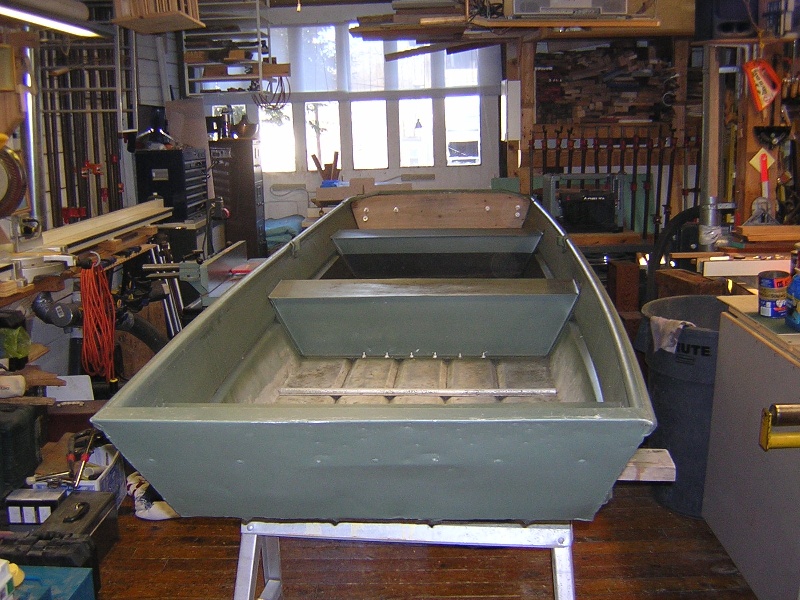
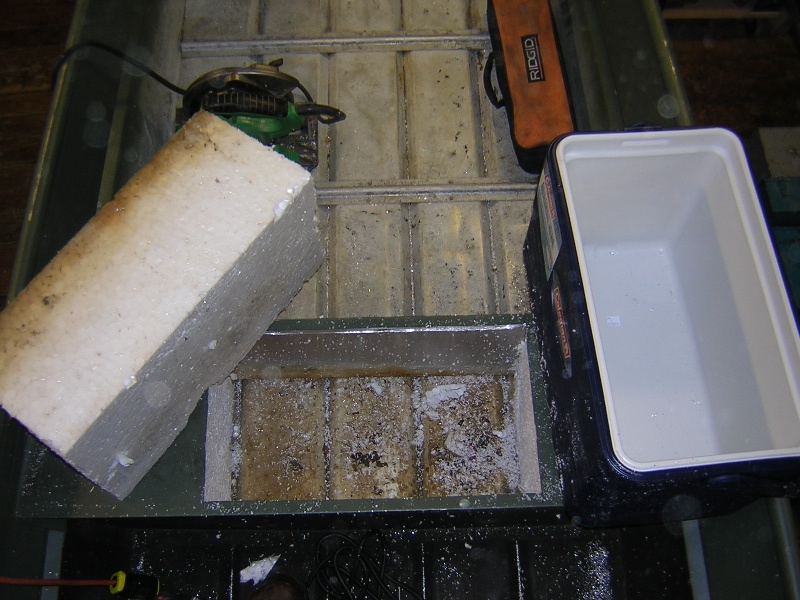
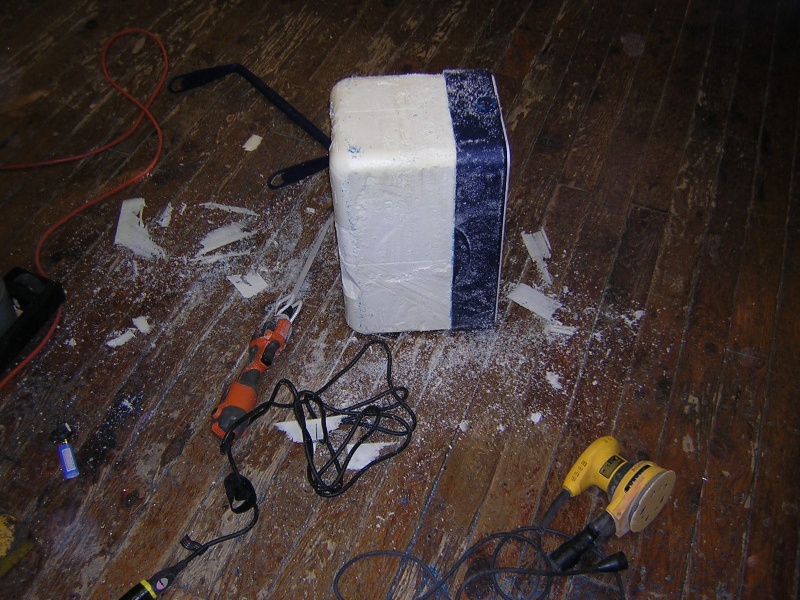
Well nows the part where I show you all the 20.00 livewell/cooler!!
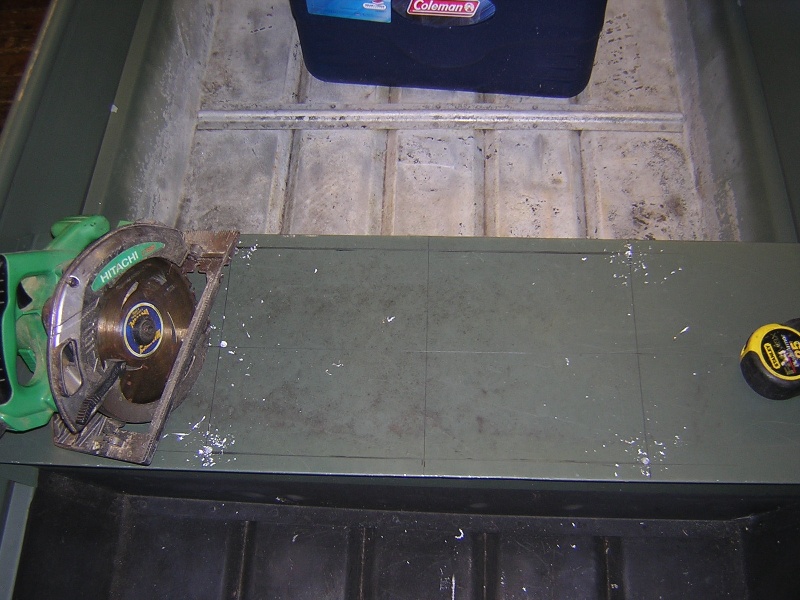
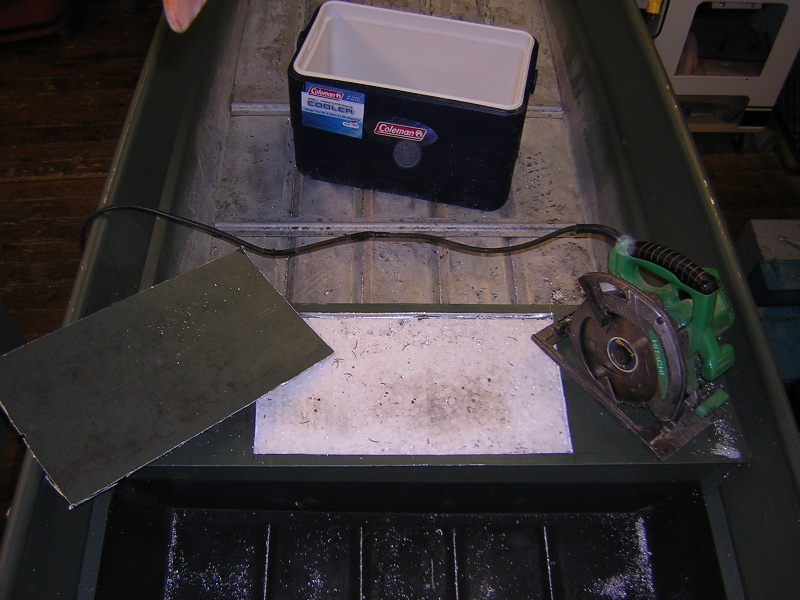
Seat measured 10 1/2" across, cooler 11" just look at the pics should explain it all!! Skinned it, trimmed it,, and plumbed it. Was all done with a skilsaw set to depth as to only cut the first layer of plastic and not the inner the some fancy sawsall work. Cut the seat out using a skilsaw, make sure to drill the corners of your cut, a round corner dissapates stress easier than a square. Less prone to metal tear or failure during torsional twist. Cut the foam with a long ass blade removed it as one piece to be recycled under the front seat. Also started some deck frame work today only had about 3 hours to play with so got as far as I could!! Any questions feel free to ask!!
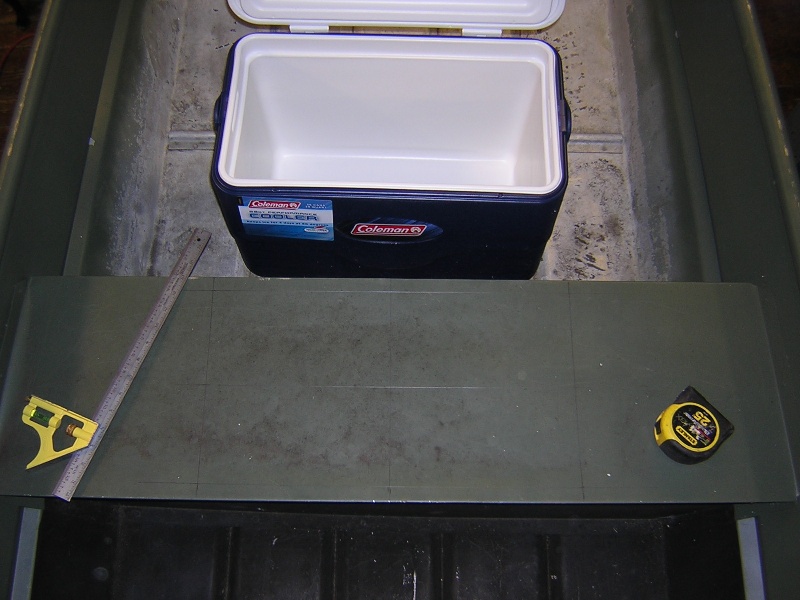


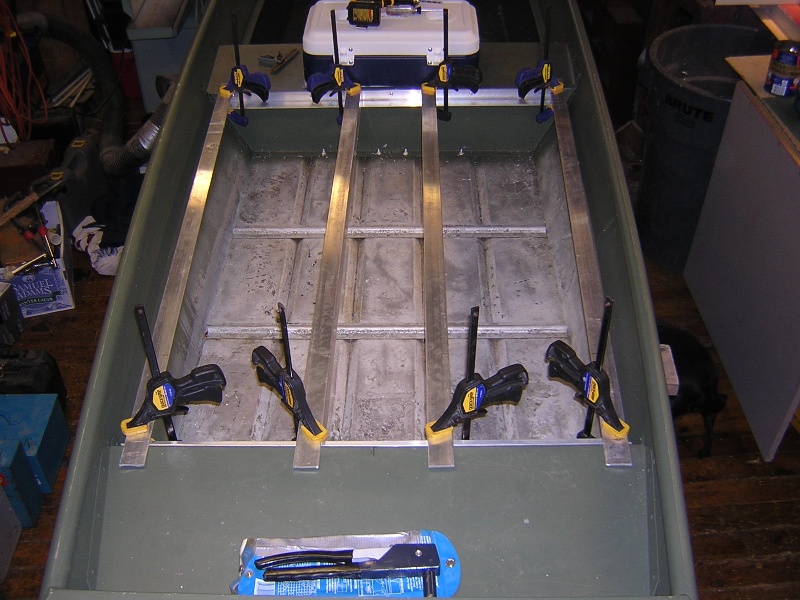
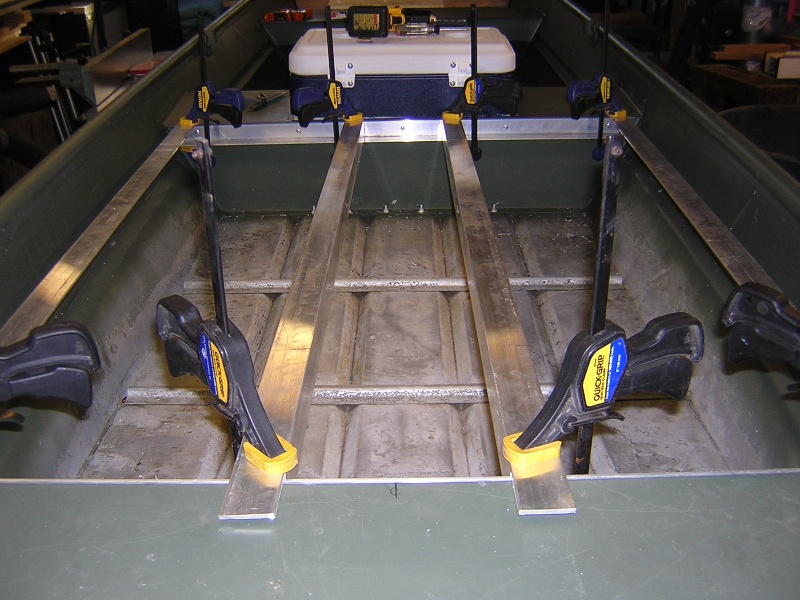
Like I said I was pressed for time today, Ill get into more depth regarding the deck design and how it works as I build it. I plan to have it wrap around the cooler and carry all the way forward, to give it a polished look. The entire system is removable, in the end held in with only 12 - 1/4 20 stainless steel machine nuts and bolts. Allows quick removal for servicing and to even further lighten up the boat if needed.
By the way the hull weight to start was 68lb, we are up to 72lb now and we already have a livewell and half the deck frame on....
Keep the comments coming guys it spurring me on!!! Thanks Again!
Riverrat I do understand how much faster using a spray gun would be, leave yours at home I run all Sata HVLP guns for any real finishing, if youve sprayed before then I dont have to say anything else!! I do appreciate the suggestion thou.
As for my choice of cans, Im trying to do this as an everyday mans build, done with convention tools, hopefully some of this will inspire guys to do a couple weekend projects with there buddies or kids!! All Im using to do this is a drill, skilsaw, sawzall and basic hand tools, and patience. I dont want this to be beyond the reach of the guy that doesnt have a crazy shop!!
Skoda, as for the sandblaster, yup I do have one, a benefit of being a third generation tool nut!! The same effect can be had with a little elbow grease and some sandpaper and wire brushes. Does help having timesavers thou....
Phase II: Deck Frame, Cooler/Livewell
Woke up early, put another coat on the rear transom board, worked on a clients piece until round 11:30 or so then ran to Walmart to procure additional boat supplies!!
9Gal Coleman Cooler: 12.00 (Clearance aisle)
1 1/8" thruhull fiting: 4.00
3/16 x 1" Aluminium poprivets 6.00
255.00 + 22.00 = 277.00 Total so far
Well nows the part where I show you all the 20.00 livewell/cooler!!
Seat measured 10 1/2" across, cooler 11" just look at the pics should explain it all!! Skinned it, trimmed it,, and plumbed it. Was all done with a skilsaw set to depth as to only cut the first layer of plastic and not the inner the some fancy sawsall work. Cut the seat out using a skilsaw, make sure to drill the corners of your cut, a round corner dissapates stress easier than a square. Less prone to metal tear or failure during torsional twist. Cut the foam with a long ass blade removed it as one piece to be recycled under the front seat. Also started some deck frame work today only had about 3 hours to play with so got as far as I could!! Any questions feel free to ask!!
Like I said I was pressed for time today, Ill get into more depth regarding the deck design and how it works as I build it. I plan to have it wrap around the cooler and carry all the way forward, to give it a polished look. The entire system is removable, in the end held in with only 12 - 1/4 20 stainless steel machine nuts and bolts. Allows quick removal for servicing and to even further lighten up the boat if needed.
By the way the hull weight to start was 68lb, we are up to 72lb now and we already have a livewell and half the deck frame on....
Keep the comments coming guys it spurring me on!!! Thanks Again!
Absolutely great post and project guys. This is the kind of thing I love as our society is full of people who will simply look at something old and not bother..we are a society of throw away people. This is a great idea and project to not only help the environment and reccyle a bit of "trash" but also to show some good fisherment that even though they have a budget, with a bit of work they could have an awesome boat!